
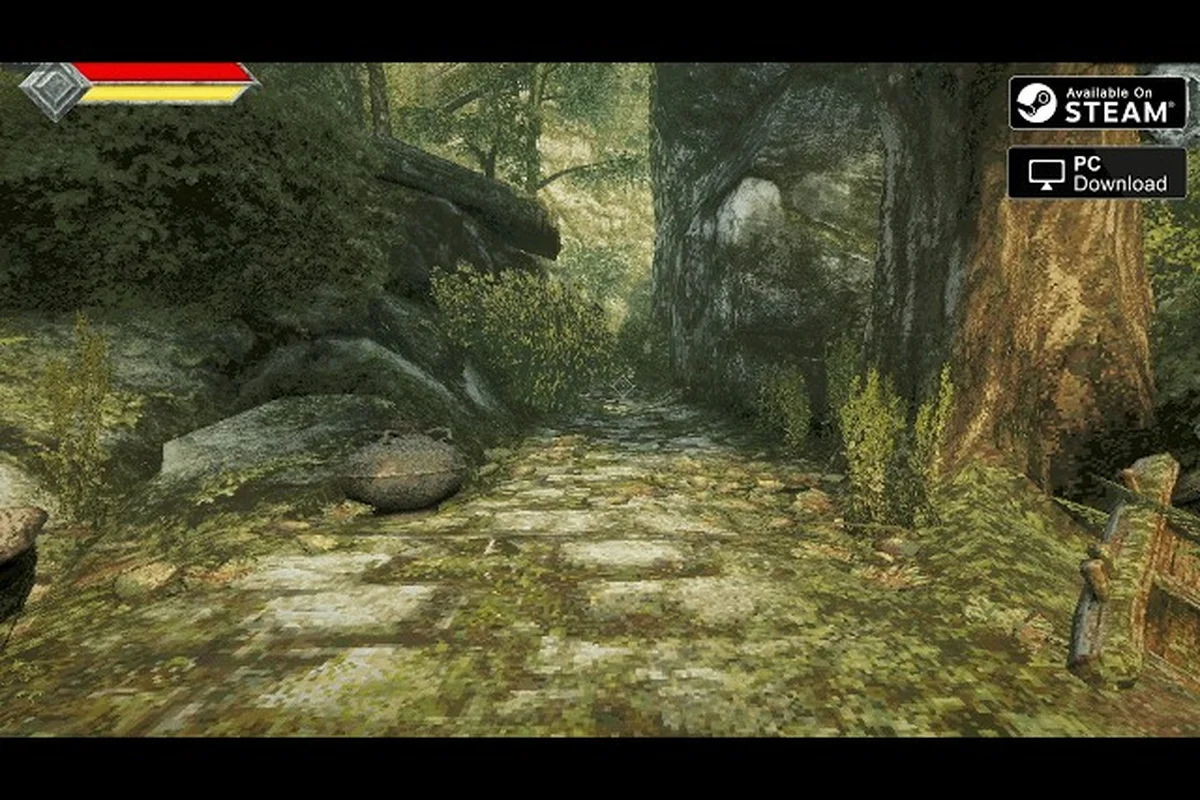
Learning a reliable Queens Domain stagger routine matters because every committed attack draws from a shared stamina budget, so a greedy combo can leave you unable to dodge the boss’s next hit. Instead, test pressure against mini-bosses by landing one short string, breaking off with a dodge roll, and checking whether the enemy’s poise breaks before your stamina reserves run low. For example, if a multi-hit sequence triggers a counterattack while your stamina is nearly empty, stop chaining after the opening hit and use the recovery window to reposition. This hit-and-run approach protects life points, preserves health, and creates safer openings without relying on unpublished poise values.
Stagger and Poise: What Is Not Documented
Queen's Domain uses a classic stamina meter for combat, and the official launch trailer shows stamina-based melee attacks, weapon-specific special attacks, charge attacks, and secondary throwing weapons. However, no published source as of 2026-10-31 explains whether ordinary enemies have a poise meter, a stagger threshold, a stagger duration, or a visible indicator when their balance breaks. The best answer is therefore not to promise that a particular sequence will interrupt every target.
Instead, treat stagger pressure as a testable behavior: attack until the enemy reacts, withdraw before its counterattack, then compare the opening you receive on the next pass. This works without assuming a hidden numerical mechanic. It also helps you discover whether pressure comes from repeated melee hits, weapon-specific specials, charge attacks, thrown weapons, or simply forcing an enemy to turn toward you.
| Combat pressure source | Confirmed feature | Unknown as of 2026-10-31 | Practical use |
|---|---|---|---|
| Melee attack | Stamina meter governs combat | No stagger value or threshold | Test for a reaction after a short sequence |
| Charge attack | Officially documented | No damage or stagger value | Use only when there is room to land it safely |
| Weapon special | Every melee weapon has its own special | No universal stamina cost | Compare cost, reach, and interruption by testing |
| Throwing weapon | More than 20 types exist | No exact count, damage, or stagger effect | Apply pressure while preserving movement |
| Enemy Poise | No formal system published | Duration, meter, and immunity unknown | Read the enemy instead of relying on a fixed combo |
Establishing a baseline in-game
Begin with a single basic melee attack against a noncritical target, then watch what changes. Does the enemy pause, step back, turn, or continue its swing? Does your character recover normally afterward, or is the stamina bar still under pressure? Record the result before adding another attack. This baseline turns the broader question of how enemies resist interruption into a useful personal test rather than an unsupported claim.
Next, compare one light sequence with one deliberate retreat. If the enemy becomes more responsive after disengaging, your successful Queens Domain hit and run pattern is probably based on creating distance before the counterattack, not on a universal stun. If the enemy continues its original swing regardless, treat repeated hits as positioning pressure rather than stagger. The result can differ by enemy, weapon, or encounter, so verify each case inside the game.
Reading reactions instead of numbers
A stagger attempt is successful only if it changes the enemy’s next action. Look for a brief interruption in the attack animation, a lost forward step, a delayed response, or a clear opening for another attack. Reaction-based verification is more reliable than waiting for a colored bar or numerical threshold that the developer has not documented.
Do not confuse visual reaction with confirmed Poise. The game’s official materials do not define Poise or Stagger as named systems, and the official Queen’s Domain Steam news feed does not publish such values in the documented patch information. Community observations can help form a hypothesis, but they should be labeled as player reports rather than treated as verified frame data.
Testing Whether an Enemy Actually Staggers
Run the same test against an equivalent enemy with a consistent opening. Use your current weapon, one ordinary attack, and then either a second attack or a short step backward. Compare the second attempt with the previous one. If the enemy behaves differently, change only one variable: attack count, weapon special, charge attack, or throwing weapon.
| Test | Starting condition | Single variable changed | What to record |
|---|---|---|---|
| A | Normal melee only | None | Enemy reaction and stamina remaining |
| B | Same initial hit | Add one melee follow-up | Longer interruption or earlier counterattack |
| C | Same initial hit | Add weapon special | Stamina cost and opening created |
| D | Same initial hit | Step out after striking | Enemy pursuit behavior and safe distance |
| E | Throwing weapon first | Add melee after it lands | Does ranged pressure affect melee timing? |
This controlled approach also avoids a common error: changing weapon and distance at the same time. For example, in test B, if an added melee follow-up leaves the enemy with less stamina before its counterattack, but test C also spends a large amount of stamina on a weapon special, you cannot tell which change caused the longer stagger. Keep the opening hit, weapon, and enemy position consistent, then repeat the same test after switching to a charge attack or throwing weapon; this makes the comparison useful for identifying the safest way to stagger enemies without exposing your health to a counterattack.
Building Hit-and-Run Pressure
A reliable Queens Domain hit and run cycle depends on stamina control rather than a published stagger formula. Strike while you have room to land the attack, observe whether the enemy loses its immediate action, and leave before the response becomes dangerous. The safest pattern is the one that preserves enough stamina to stop, reposition, or retreat.
Every melee weapon has a weapon-specific special attack, and the game also supports charge attacks. These options can create pressure, but they also draw on the same stamina economy that governs ordinary combat. The launch materials confirm the stamina system and weapon specials but do not provide exact costs, so the useful comparison is the amount of stamina visibly consumed and the space each option requires.
The four-beat pressure cycle
Use a repeatable four-beat cycle: read, commit, observe, separate. Read the enemy’s stance and current action. Commit to a short, purposeful hit. Observe whether the response is delayed or redirected. Separate from the target if it continues moving toward you, then begin the next exchange from a better angle.
A four-beat cycle does not mean four attacks. It is a decision process that prevents extra hits from turning a useful opening into a stamina emergency. If one strike produces a clear interruption, add pressure only after confirming that the interruption exists. If it does not, withdraw and change range rather than forcing a longer combo.
| Phase | Action | Stamina decision | Best reason to stop |
|---|---|---|---|
| Read | Watch the enemy before committing | Preserve enough reserve for movement | Enemy begins an unmistakable counterattack |
| Commit | Land a controlled melee hit | Use one attack or a short sequence | Reaction creates a clear opening |
| Observe | Check for delayed movement or lost action | Avoid adding another costly action | Enemy resumes normal activity |
| Separate | Reposition or create distance | Spend only what safety requires | No opening appeared |
Choosing a weapon special
Compare each special in a safe test area rather than assuming one universally staggers. Look at three qualities: animation commitment, reach, and the amount of stamina remaining afterward. A long animation may produce more pressure but also leave you exposed. A compact special may preserve options even if it creates a smaller opening.
The basic combat guide can help with attack timing, sprinting, and stamina regeneration, while this guide focuses on what to do after an impact. Keep the same enemy and weapon during a test, then note whether the special creates a reaction comparable to a basic hit. You are comparing behavior, not undocumented damage numbers.
Using throwing weapons as pressure
Secondary throwing weapons can interrupt the rhythm of a melee exchange, but their exact interaction with stagger is not documented as of 2026-10-31. Treat a throw as a tool for spacing, distraction, or forcing an enemy to acknowledge a new threat. Do not spend resources expecting a guaranteed stagger unless your own test consistently shows one.
A practical sequence is to throw while moving laterally, observe whether the enemy turns or changes its approach, and then decide whether to close with melee or preserve the extra distance. If the enemy ignores the throw, the throwing option has still created room to reposition. If it reacts, use that reaction to choose the next attack rather than automatically rushing in.
When to keep pressure or break contact
Continue pressure when the enemy is delayed, turning, or moving out of its normal attack range. Break contact when it resumes a smooth attack sequence, approaches quickly, or your stamina reserve becomes too thin for safe movement. The objective is not maximum aggression; it is maintaining the option to choose the next exchange.
| Current result | Continue or disengage | Reason |
|---|---|---|
| Enemy clearly pauses or loses its step | Continue briefly | A usable opening has been created |
| Enemy trades attacks normally | Disengage | The hit did not produce useful pressure |
| Enemy closes distance quickly | Break contact | Your current position is becoming unsafe |
| Stamina bar is low | Retreat and reassess | Another commitment may remove your defensive option |
| Special creates a long opening | Continue | The payoff is visible and worth spending |
These decisions make the pressure routine adaptable because enemy animations often signal whether the next hit will land cleanly, trade during recovery, or expose your position. Treat a connected hit as progress only when it interrupts the enemy’s attack cycle or creates a visible opening; if it merely lands during their active animation, stop the hit-and-run rotation and disengage before their counterattack reaches you. For example, after a successful dodge, one extra strike can be justified, but chaining a second hit into a boss’s counter can deal more damage than a measured cycle while also removing the stamina needed to retreat safely.
Mini Boss Fights Without Phase Data
Queen’s Domain contains more than 100 enemies, mini bosses, and bosses combined, but the developer has not published a mini-boss list, phase structure, poise table, or exact health values. Queens Domain mini bosses should therefore be studied as encounter-specific tests, not assigned invented names or weaknesses. The only officially named creatures are Mimic, Star Lizard, ojum lizard, and eye plants, and even their full encounter roles are not detailed publicly.
For practical Queens Domain boss fight tips, separate what you can observe from what you hope the enemy will do. Observe the opening animation, the attack range, whether it follows after a retreat, and whether repeated hits alter its rhythm. Build the encounter around the confirmed stamina system rather than an assumed stagger threshold.
Build a mini-boss checklist
Use a checklist before committing to a new sequence against a Queens Domain mini-boss. Each test isolates one variable, such as the same basic hit, separation distance, or weapon special, so a failed stagger experiment does not consume too many health points and obscure the cause of the result. Repeating the sequence from the same range also reveals whether the enemy’s follow-up behavior comes from your hit-and-run spacing or from an actual stagger reaction, making later comparisons more reliable.
- Record the enemy’s first attack and the distance at which it begins.
- Test one basic hit followed by immediate separation.
- Compare one ordinary sequence with the same sequence ending in a weapon special.
- Note whether the enemy follows, stops, or changes direction after you leave.
- Confirm how much of the stamina bar remains after each commitment.
- Identify one safe retreat route before testing more advanced pressure.
- Record any visible reaction that interrupts the enemy’s next move.
Do not record a reaction as a guaranteed stun unless it repeats across multiple attempts. A single delayed animation may be caused by movement, attack recovery, or your own positioning. Repeat the test from the same range and weapon before drawing a firm conclusion.
Read the encounter, not an imagined phase list
Published material confirms weapon-specific specials, charge attacks, throwing weapons, and more than 50 findable melee weapons. It does not confirm phase thresholds for any boss or mini boss. Avoid planning around a guessed percentage of health because the mini boss overview must distinguish verified names and encounters from community assumptions.
| Mini-boss test | What it reveals | What it cannot prove |
|---|---|---|
| Basic hit, then retreat | Distance management and pursuit behavior | Hidden Poise or stagger value |
| Short melee sequence | Whether resistance changes within one exchange | A named phase threshold |
| Weapon special after a normal hit | Comparative pressure and stamina commitment | Universal mini-boss weakness |
| Throwing weapon followed by melee | Distraction and opening quality | Ranged damage or guaranteed stagger |
| Charge attack from a fixed start | Commitment cost and landing opportunity | Exact damage multiplier |
Match pressure to the enemy’s response
An enemy that pauses after a hit deserves a brief follow-up. An enemy that keeps advancing through the hit should be met with spacing and a change of angle. An enemy that attacks from range needs a different rule: move away from the incoming action, then test a single approach rather than standing in a tradeable distance.
Player reports may offer clues about individual encounters, but they cannot establish a general phase system. As of 2026-10-31, verify encounter behavior through repeated in-game tests and save the more consistent patterns. The boss order and strategy overview is useful for connecting observation with broader progression decisions, while this guide keeps the focus on pressure, timing, and survival.
Avoiding Damage With Positioning
Queens Domain how to avoid damage is primarily a positioning question because the combat rules do not publish exact attack ranges, dodge windows, invulnerability frames, or Poise values. Position outside the enemy’s current reach when possible, attack from a stable angle, and leave an escape lane before committing. Waiting for a confirmed opening is safer than assuming every hit can interrupt.
The official launch trailer shows first-person exploration, flight across gaps, melee combat, throwing weapons, and a stamina meter. It does not show a universal dodge or parry system. Media previews mention parrying, but the developer has not documented it as of 2026-10-31, so do not build a mandatory strategy around a mechanic you cannot verify.
The three-distance test
Before attacking, identify three distances: the enemy’s current reach, the distance of your planned hit, and the space available for separation. Your attack should connect from a stable position, while your retreat should move you beyond the enemy’s immediate response. If there is no room to separate after the attack, the chosen distance is not a safe pressure position.
| Position | Risk | Better adjustment |
|---|---|---|
| Inside enemy reach with no exit | A missed or blocked hit can leave you trapped | Step back before committing |
| Just outside reach | Repeated forward movement may cause an accidental trade | Circle until the opening is clear |
| Stable side angle | A predictable path may support a short hit | Attack, then evaluate the reaction |
| Narrow corridor or ledge | Retreat options are limited | Use ranged pressure or avoid overcommitment |
| Open area | More room to observe and separate | Use distance to test enemy behavior |
Control the disengagement, not just the attack
The hit is only half of the exchange. After impact, move in a direction that changes the enemy’s approach rather than backing straight into another danger. Watch the screen edges, nearby hazards, and uneven ground while moving. A safe retreat that ends beside a pit or obstacle is not actually safe.
Stamina management supports this positioning. If you are already low, the simplest damage-avoidance plan may be to end the exchange rather than squeeze in one more attack. The stamina and healing guide provides a broader look at maintaining that reserve, including considerations for Queens Domain health and recovery decisions.
Use the weapon, not one universal combo
A weapon with long reach can create distance, while a faster weapon may make short retreats easier to repeat. Charge attacks and weapon specials can be useful, but their exact stamina costs and recovery behavior are not documented. Compare them under controlled conditions instead of chaining every available option.
The strongest pressure pattern will usually preserve a clear decision: attack again if the reaction creates an opening, or leave if it does not. This avoids relying on an undocumented damage threshold and gives you a repeatable answer to the central stagger question.
Health, Life Points and Retreat Rules
Queen’s Domain health is represented through life points, and the life charm is an accessory that raises them. Food can also raise stats, while XP provides leveling. No official source as of 2026-10-31 publishes exact health totals, healing rates, enemy damage values, or difficulty-specific thresholds, so the safest defense is preserving information and stamina rather than guessing a safe number of hits.
Treat retreat as part of the fight
A retreat is not wasted time if it prevents a trade and lets you correct your plan. After taking damage, separate far enough to stop immediate danger, then assess the cause. Was the attack missed because of a long enemy wind-up, an unclear opening, a crowded position, or a depleted stamina reserve? Each cause requires a different adjustment.
| Cause of damage | Immediate response | Next adjustment |
|---|---|---|
| Attack continued too long | Stop the sequence and create distance | Use a shorter commit |
| Enemy resisted the hit | Disengage before the counterattack | Test another source of pressure |
| Enemy closed from the side | Move laterally and re-establish range | Avoid standing directly in front |
| Stamina ran low | Retreat without another committed attack | Preserve a defensive reserve |
| Unclear opening | Pause and observe another attack cycle | Verify reaction before striking |
Track life points as relative signals
The interface may show your current life points, but no official percentage threshold explains when a fight should be abandoned. Use visible changes instead: a low bar, delayed healing, or a sudden change in enemy pressure can each justify disengagement. If the enemy can heal, the issue becomes more urgent, although individual enemy healing behavior is not documented publicly.
Food and a life charm can support a broader progression plan, but neither removes the need for good positioning. Food raises stats, while the charm raises life points; the specific stat gains and exact life-point increase are not documented as of 2026-10-31. Verify their effects in the equipment and inventory menus rather than relying on a guide that invents fixed values.
Decide whether to continue or reset the encounter
Resetting an attempt can be safer than repeatedly accepting unavoidable damage. Before continuing, confirm that you have identified a clearer attack pattern, a safe starting position, and a retreat route. If the enemy still lands several attacks without a meaningful opening, a cleaner reset may be the lower-damage choice.
A useful post-fight log should remain short, but it should capture whether each attack created a stagger window or merely forced a hit-and-run retreat. Note the health and stamina cost of the opening, the enemy’s response after you create distance, and whether the next attempt should begin from the same position or a safer one. This makes the log practical for practicing the Queens Domain stagger loop: a clear reaction window, a controlled escape, and no wasted stamina chasing a target that has not been staggered.
| Record | Why it matters |
|---|---|
| Damage taken during the opening | Shows whether the start position was safe |
| Best reaction created | Identifies your most reliable pressure method |
| Stamina left after that action | Shows whether the method is repeatable |
| Enemy response after retreat | Reveals whether distance controls pressure |
| Failure pattern | Gives the next attempt a specific correction |
Turning Pressure Into a Repeatable Fight Plan
The most reliable answer to the challenge of how enemies resist interruption is a repeatable test: land one measured action, observe whether the enemy loses its next move, and protect your stamina while checking the result. Queens Domain how to stagger enemies cannot be reduced to a published combo because no universal Poise value, stagger duration, or mini-boss phase list is documented as of 2026-10-31.
Use short melee pressure when it creates a reaction, weapon specials when their cost and reach fit the space, and throwing weapons when they improve spacing or distract the target. Retreat when the response remains normal, the enemy closes quickly, or your stamina reserve becomes thin. That decision-based routine turns the game’s confirmed stamina combat into practical pressure while keeping life points under your control.
Frequently Asked Questions
Can you reliably stagger every enemy in Queen's Domain?
No universal stagger value or formula is documented as of 2026-10-31. Test whether an enemy pauses, loses a step, or delays its response after a measured hit. Repeat the test with the same weapon and range before treating the reaction as consistent. Your practical target is a clear opening, not an assumed hidden threshold.
What is the best way to create pressure during a boss fight?
Use the shortest committed action that produces a useful reaction, then decide immediately whether to follow up or separate. Mix basic melee, one weapon-specific special, and throwing weapons only after comparing their stamina cost and pressure in practice. Exact boss health, phase changes, and Poise values are not publicly documented.
Are mini bosses easier to stagger than standard enemies?
Not in a way that can be confirmed from official data. Queens Domain mini bosses may respond differently because of their attacks, durability, or movement, but no list of mini-boss Poise values is published. Treat each encounter as a separate test and record whether your hit delays the next action, creates distance, or fails to change the fight.
Should I keep attacking when an enemy does not react to a hit?
No. If the enemy continues its attack after your hit, another committed attack may expose you to a counterattack while consuming stamina. Separate, observe, and change one variable such as weapon special, range, or attack count. A controlled retreat is often more useful than forcing an undocumented stagger.